Sweater with Cable Pattern

How to knit the sweater with cable pattern:
Size: US 10–12, UK 12–14.
Material:
Low-pile yarn with mohair content, knitting needles size 4 (US 6 / UK 8) – 4.5 (US 7 / UK 7).
Ribbing Pattern 2 × 2: alternate 2 knit stitches and 2 purl stitches.
Stockinette Stitch: right-side rows – knit stitches, wrong-side rows – purl stitches.
Reverse Stockinette Stitch: right-side rows – purl stitches, wrong-side rows – knit stitches.
Gauge: 18–20 stitches and 22–24 rows = 10 × 10 cm (4 × 4 in).
Left Front:
Cast on 60–62 stitches and work 22–24 rows in Ribbing Pattern 2 × 2.
Continue in Stockinette Stitch.
After 30–35 cm (12–14 in) from the beginning of Stockinette Stitch, for the kimono sleeve, increase 2 stitches 4–5 times in every 2nd row.
Work straight 10–11 cm (4–4¼ in) in Stockinette Stitch.
For the neckline on the right side, bind off 6 stitches once, 3 stitches once and 1 stitch 7 times.
After 22–24 cm (8¾–9½ in) from the start without further increases, bind off the remaining shoulder stitches.
Work the right back section symmetrically.
Right front:
Cast on 134–136 stitches and work in Ribbing Pattern 2 × 2.
On the last 5–7 stitches, work a decorative edge band.
To imitate the Ribbing Pattern 2 × 2, work 3 rows Stockinette Stitch and 3 rows Reverse Stockinette Stitch alternately.
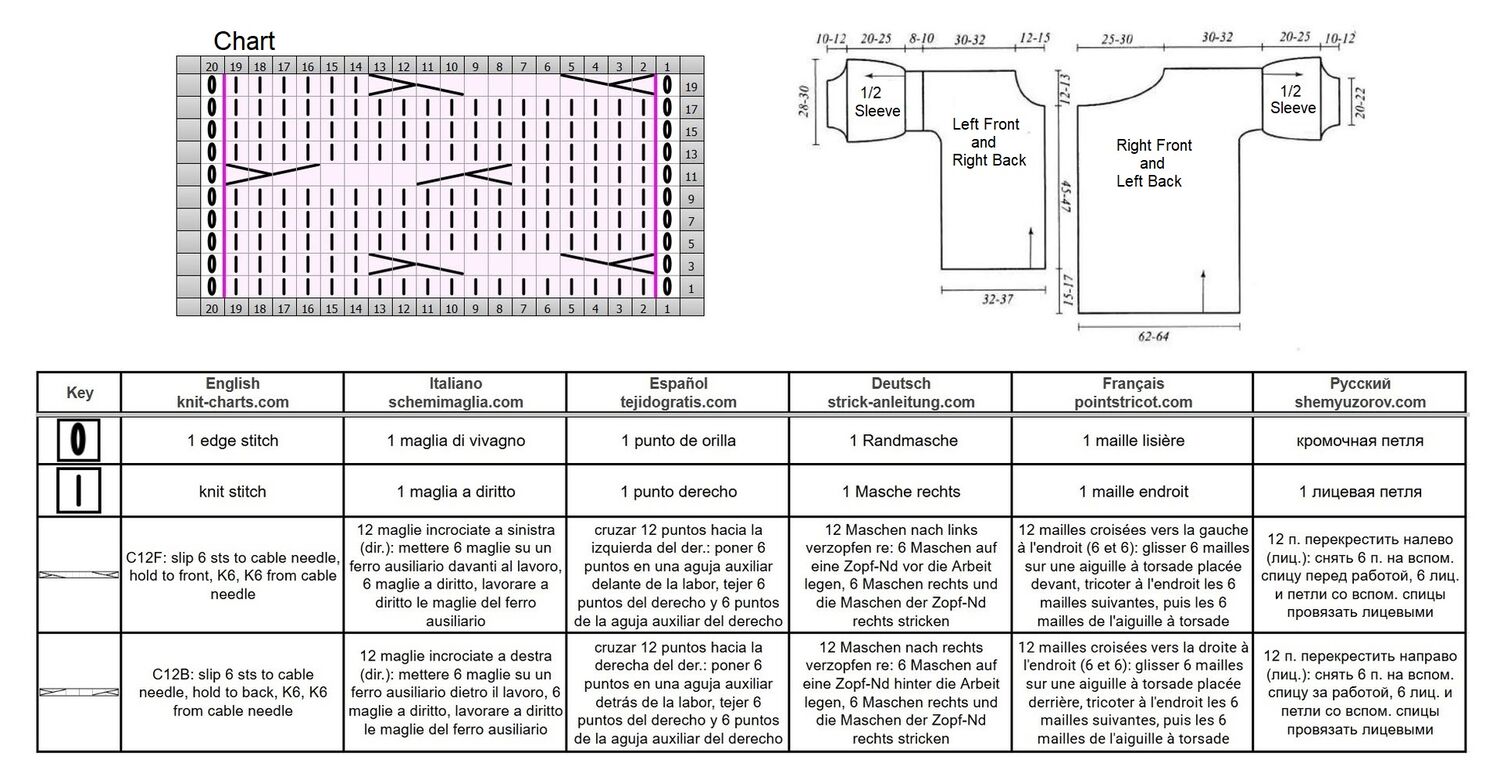
After 6–8 rows, distribute the stitches as follows: edge stitch, *6 purl stitches, 18 stitches in cable pattern*, repeat from * to * 4 more times, 7 purl stitches, 2 knit stitches, 5–7 stitches for the decorative band, edge stitch.
After 55–60 cm (21½–23½ in) from the beginning, for the kimono sleeve increase 2 stitches 4–5 times in every 2nd row.
Continue on all stitches, keeping the decorative band on the first 5–7 stitches.
After the decorative band, work 2 knit stitches.
Work straight 10–11 cm (4–4¼ in) in Stockinette Stitch.
For the neckline on the left side, bind off 39–40 stitches.
To shape the neckline curve, bind off 1 stitch 7 times in every 2nd row.
After 22–24 cm (8¾–9½ in) from the start without increases, bind off the remaining shoulder stitches.
Work the left back section symmetrically.
Sew the shoulder seams.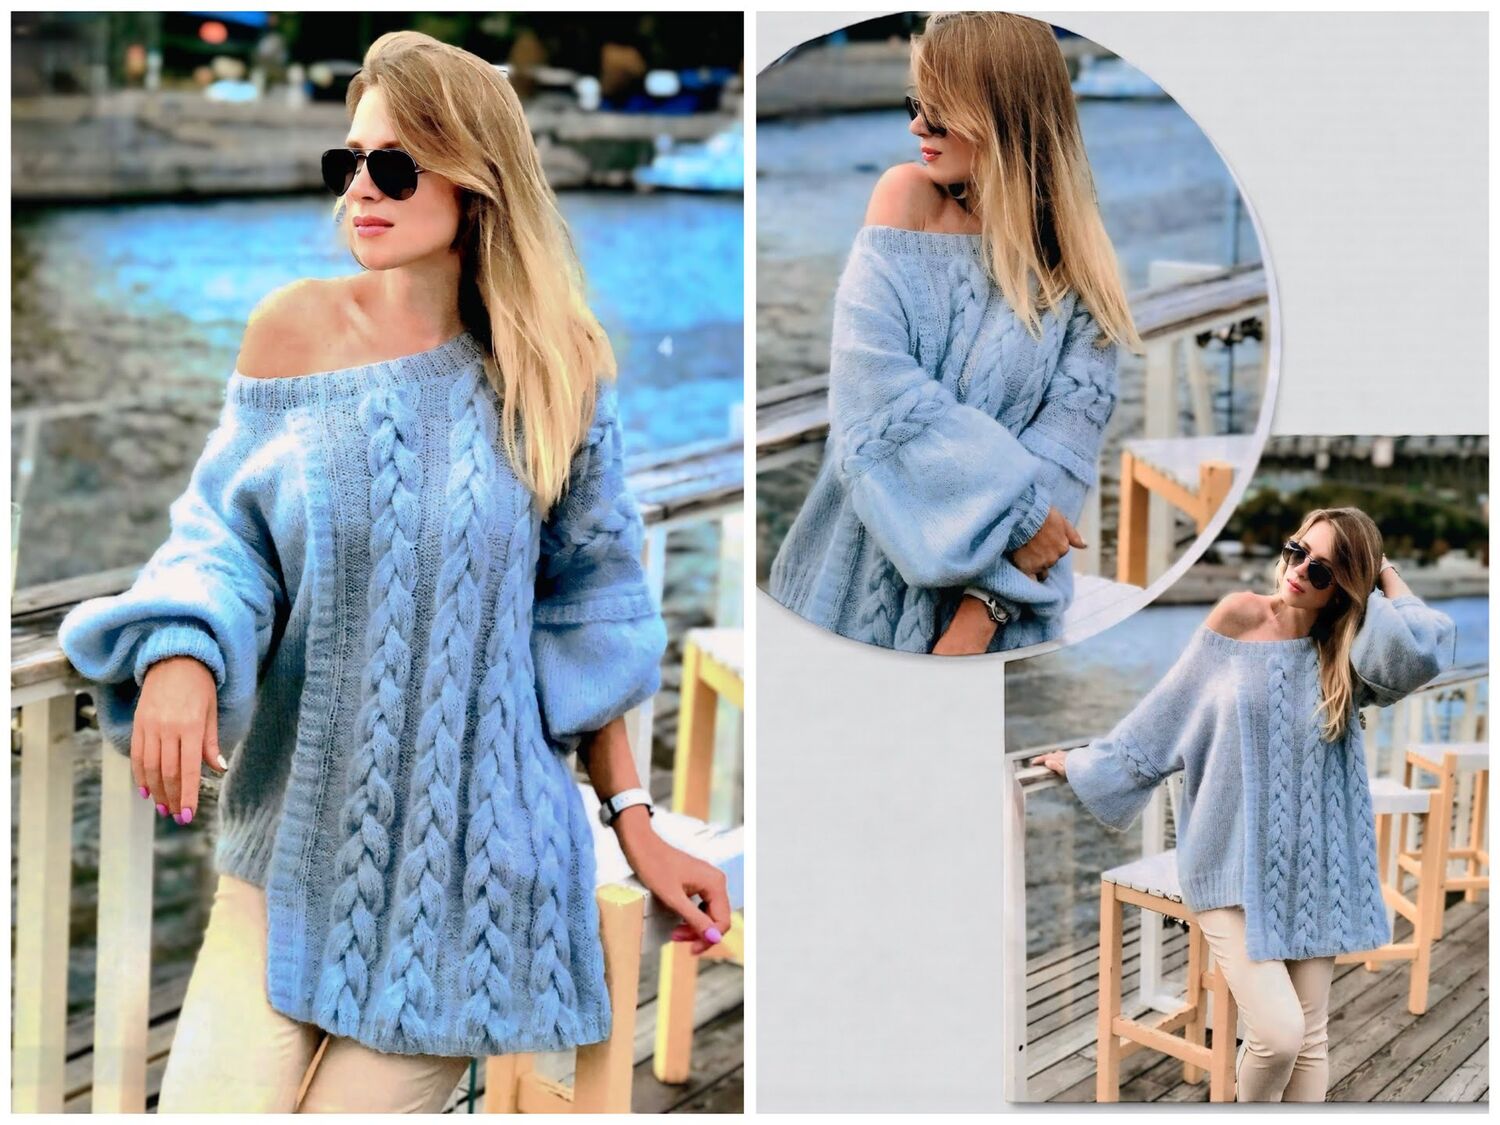
For the decorative band of the right sleeve, cast on 24 stitches.
Distribute the stitches as follows: edge stitch, 2 purl stitches, 18 stitches in cable pattern, 2 purl stitches, edge stitch.
After 44–48 cm (17¼–19 in) bind off all stitches.
Sew the finished band along the edge of one sleeve.
Then pick up the required number of stitches along the sleeve edge.
To widen the fabric, increase the number of stitches by one-third.
Continue in Stockinette Stitch.
After 20–25 cm (8–10 in) decrease the number of stitches by half.
After another 2–3 cm (¾–1¼ in) decrease the stitches by one-third.
On the remaining 46–48 stitches, work 8–10 cm (3–4 in) in Ribbing Pattern 2 × 2 and bind off all stitches.
For the left sleeve, pick up the required number of stitches.
Pick up stitches from the loops of the knit stitches (the sleeve will start under the decorative band).
Work as for the right sleeve.
Sew the sleeve seams.
Finishing:
Join the front sections by overlapping the left section over the right by the width of the decorative band.
Join the back sections in the same way.
Along the edge of the neckline, pick up the required number of stitches and work 10–12 rounds in Ribbing Pattern 2 × 2, then bind off all stitches.